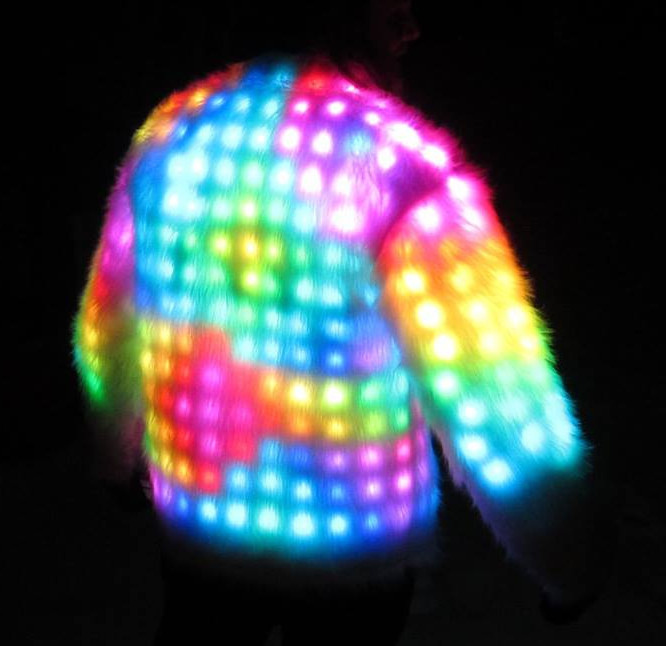
Since this has gotten shared outside of where I can comment or where people have any context for it, here's a six second video of the coat.
Here's another more recent video taken at burning man 2016.
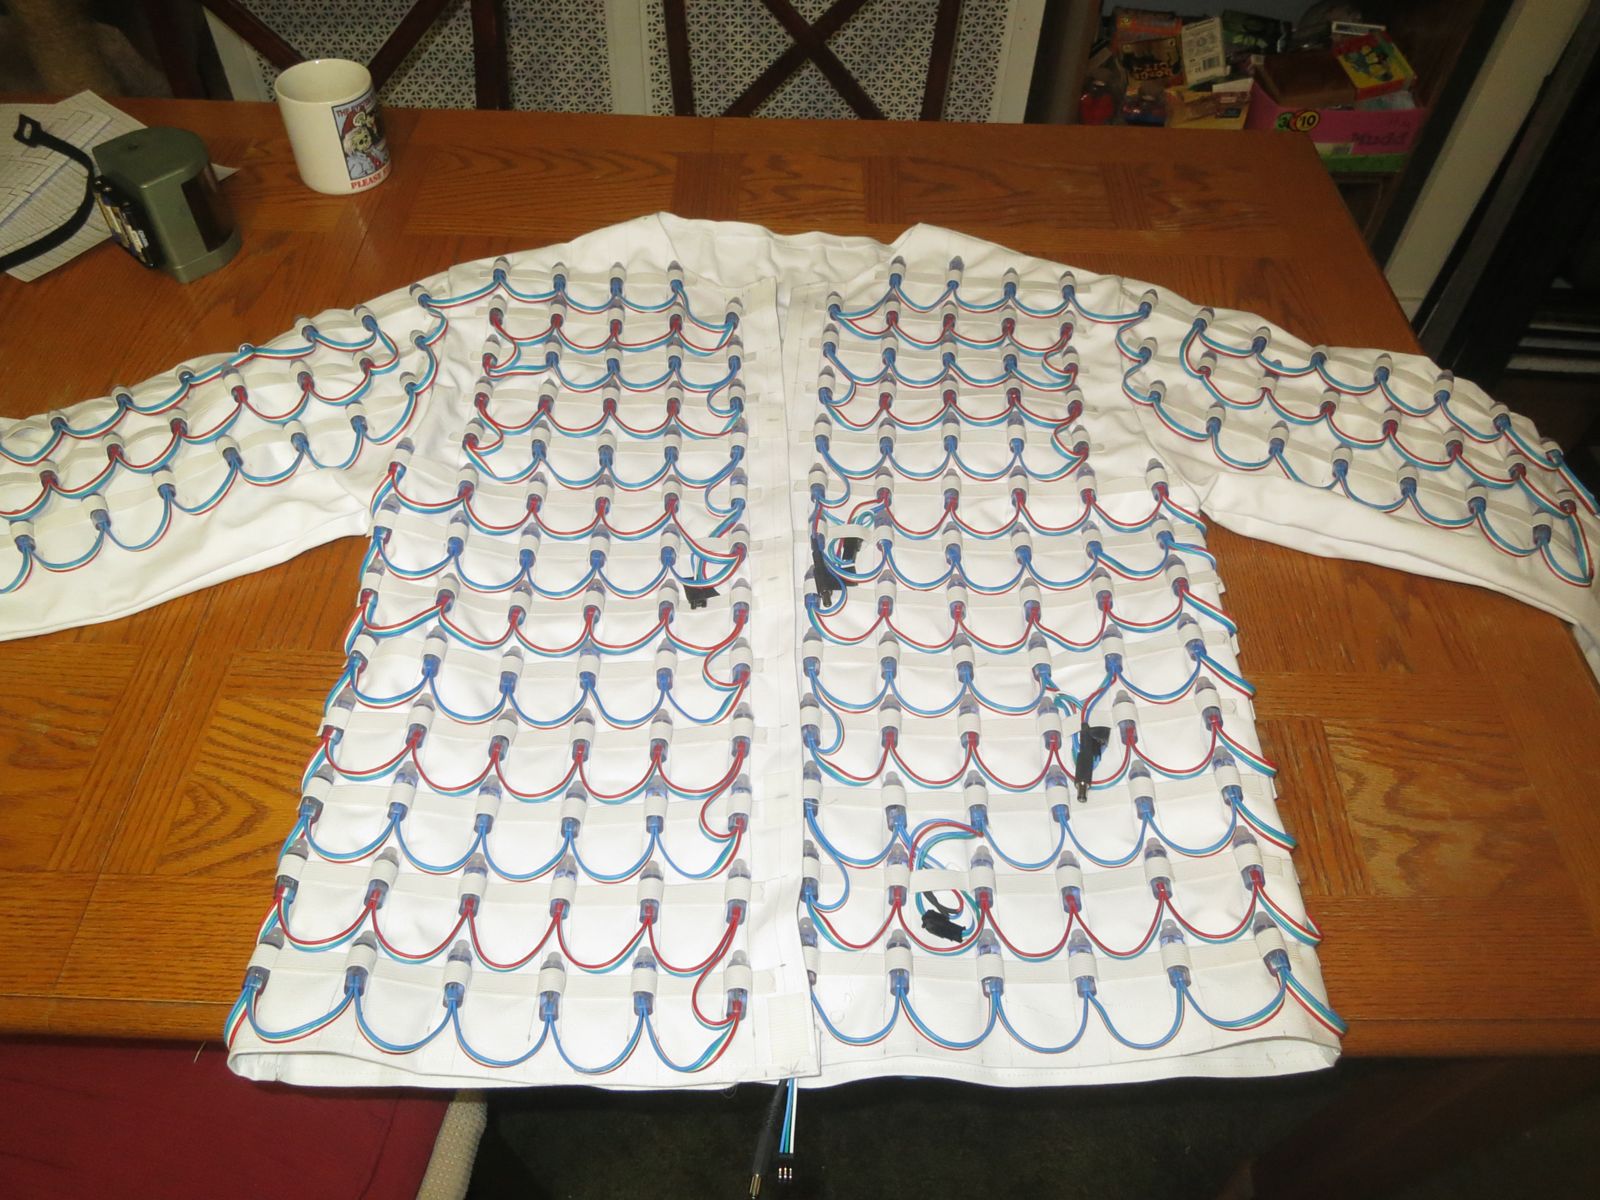
The coat is made up of several pieces:
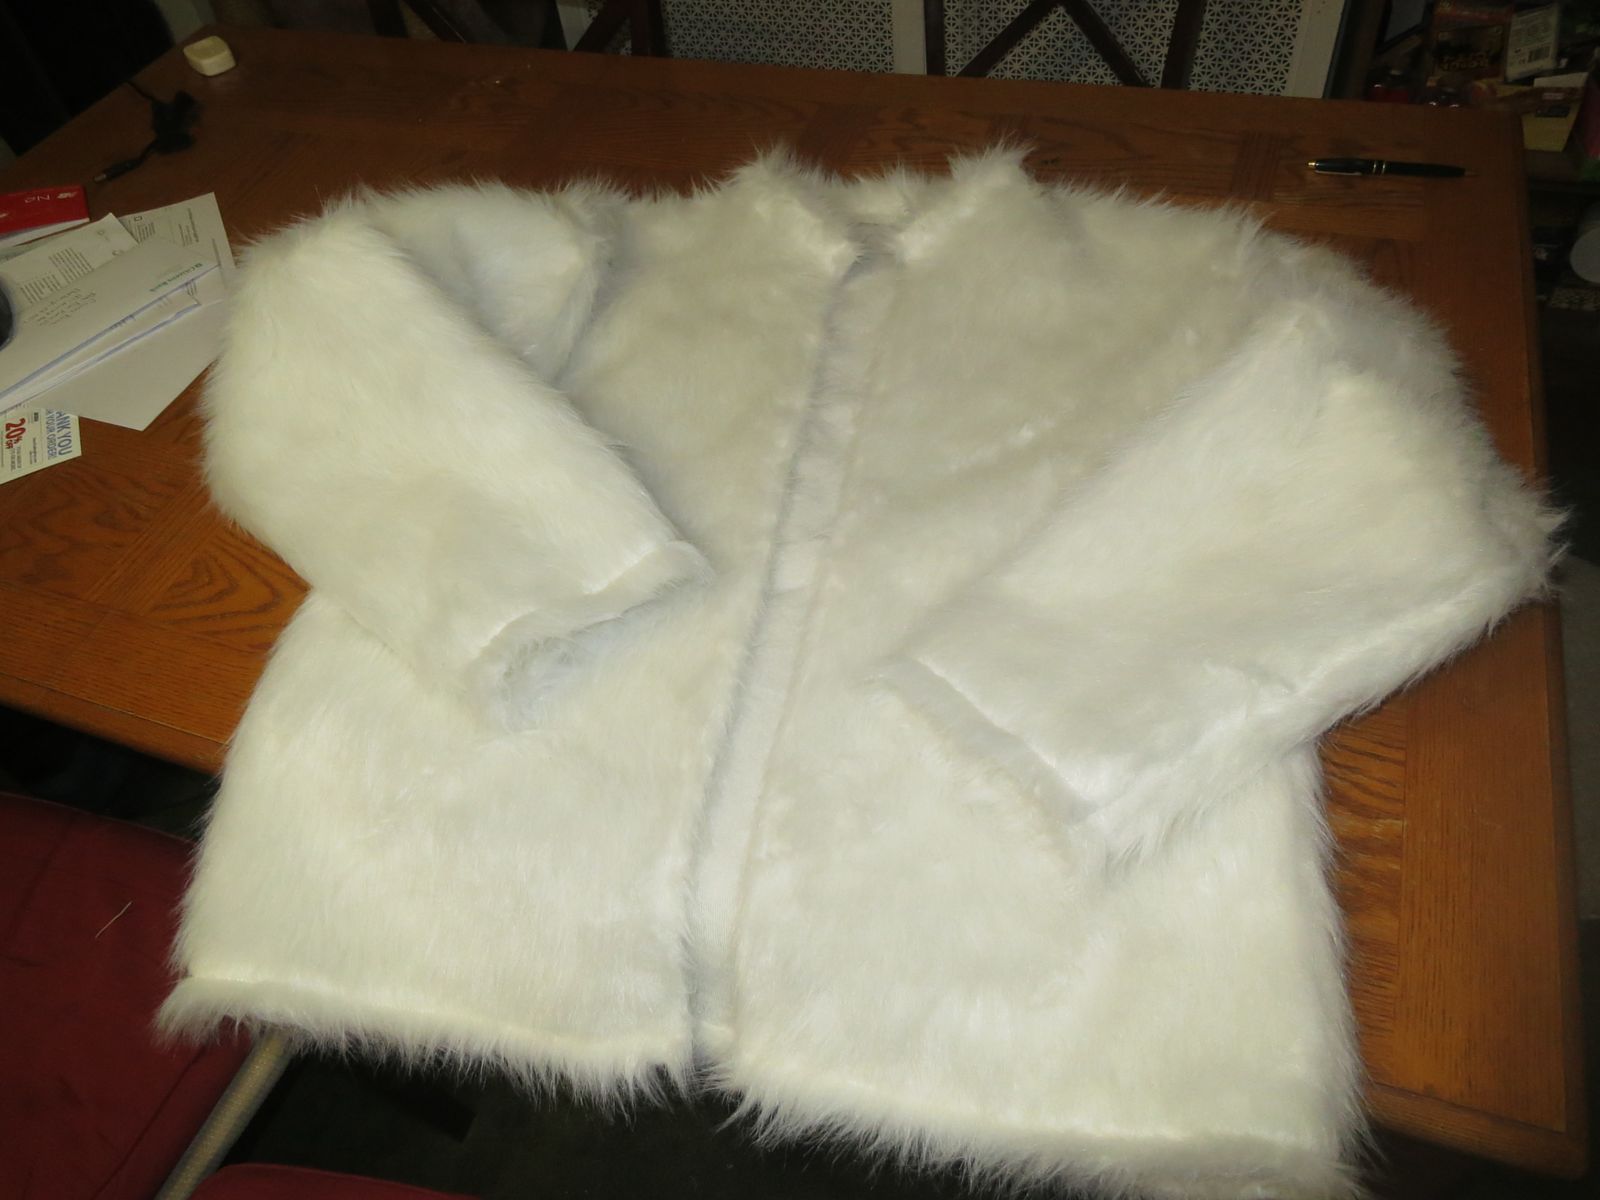
To make the jacket I took one of my other winter jackets, measured and traced the separate panels (back, two front sides and two sleeves) onto the faux fur, cut them out sewed them together and added a short collar. I used cheap hook and eye clasps to keep the design minimal. I can't really provide a tutorial on making this part. This project is very much a sewing project while making your own sewing pattern at the same time. If you're new to this, one of the most important things to pay attention to is make sure that any edge that is going to be sewn to another edge is the same length after you've traced the pattern, otherwise corners don't line up. This may or may not be obvious before you've screwed it up once but it's probably the most important thing when creating your own pattern.
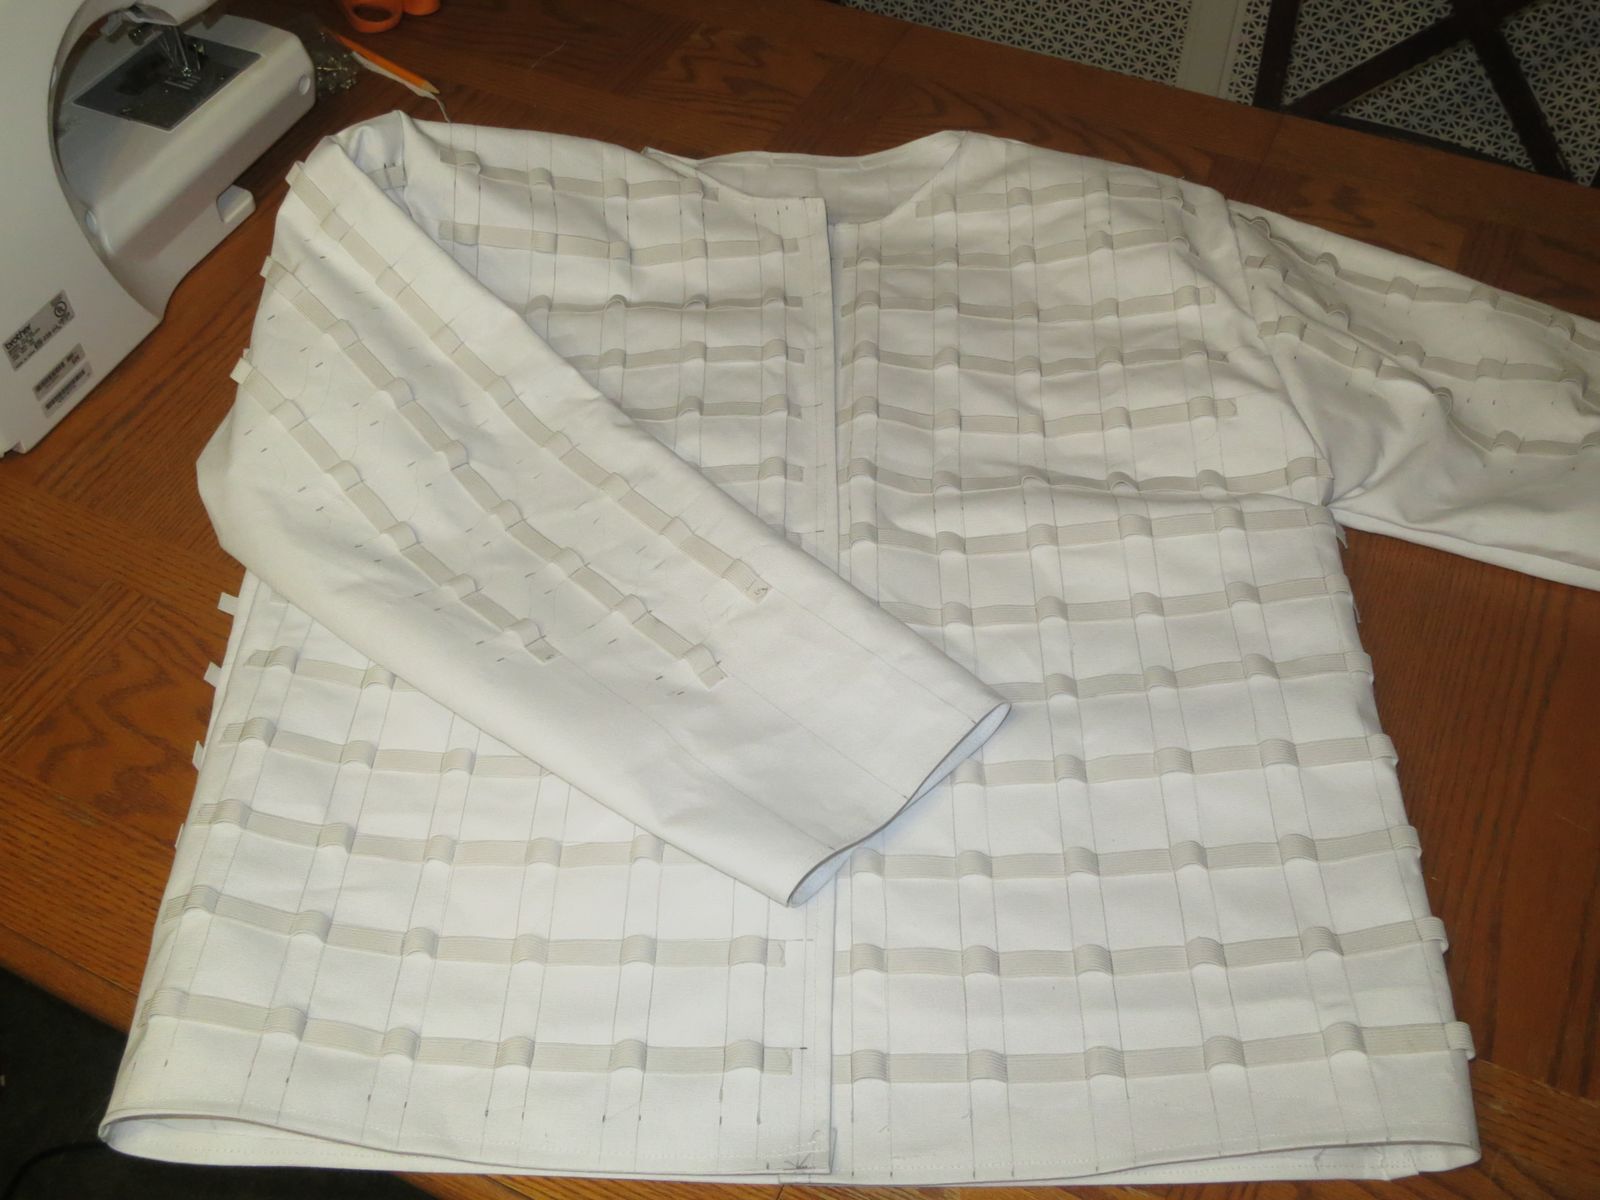
I made a similar set of panels out of cotton duck.

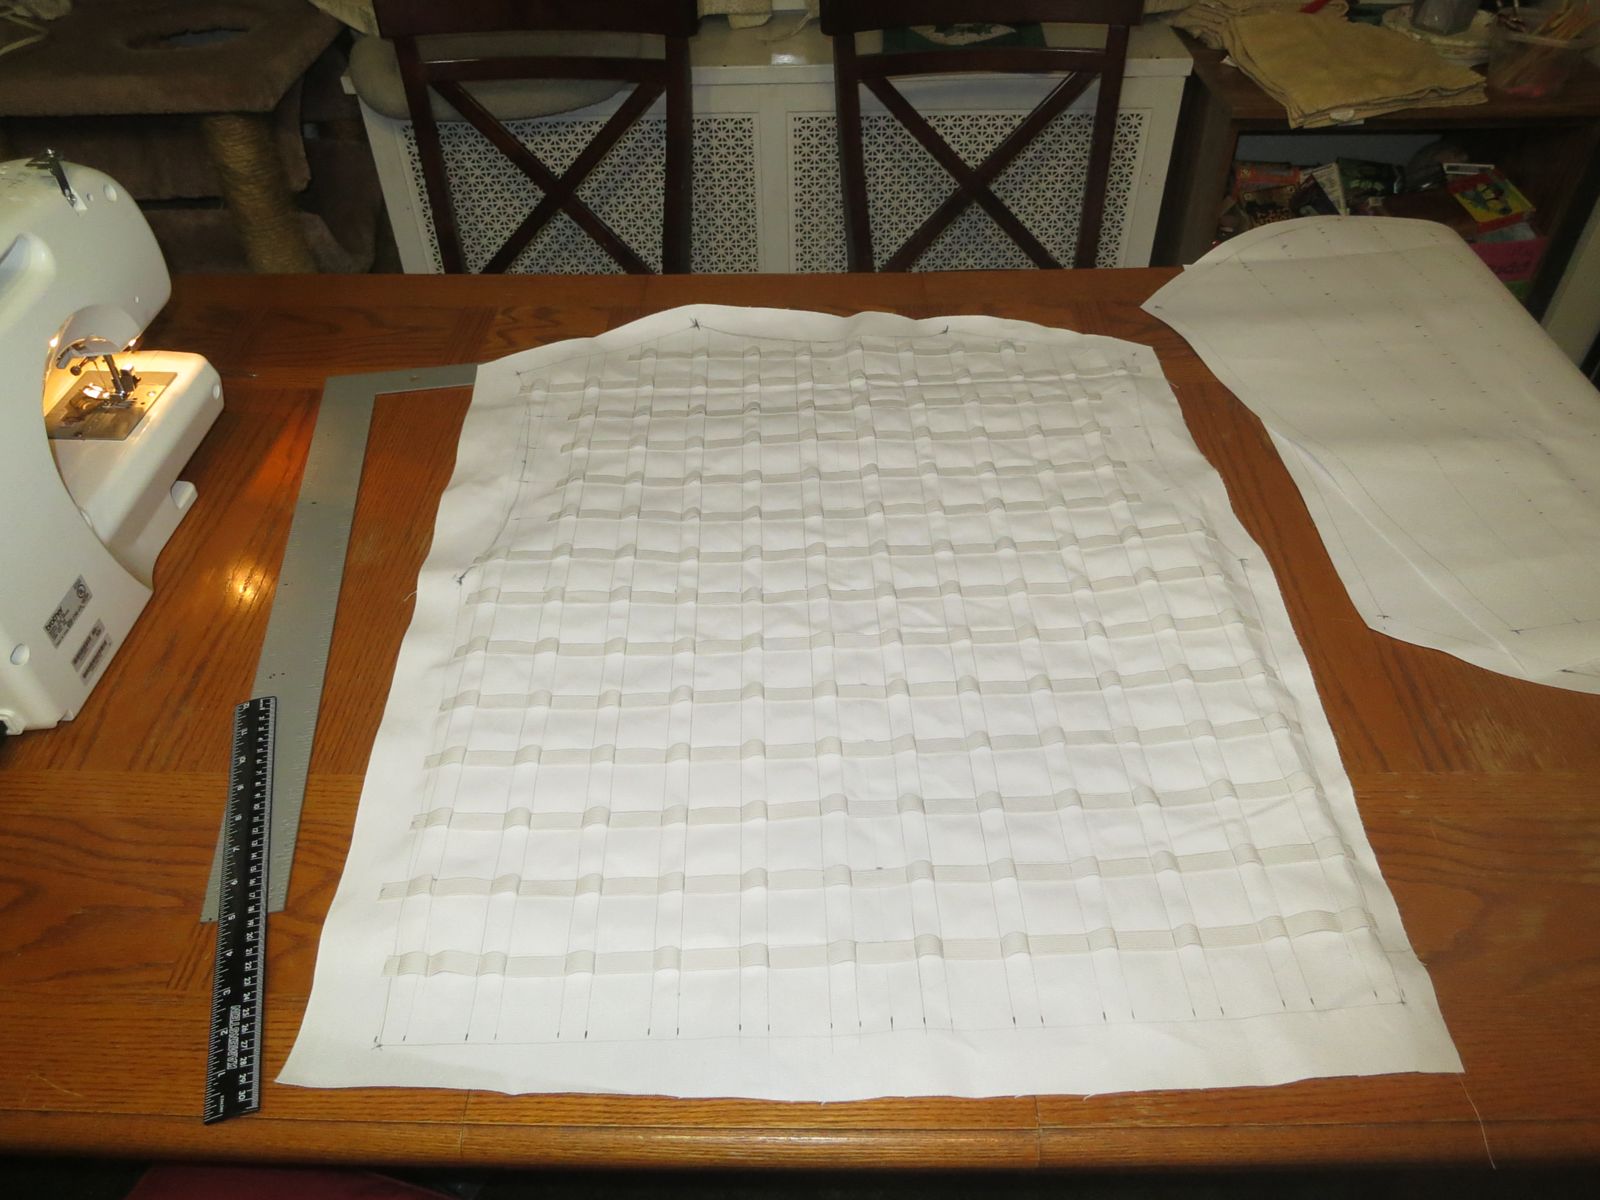
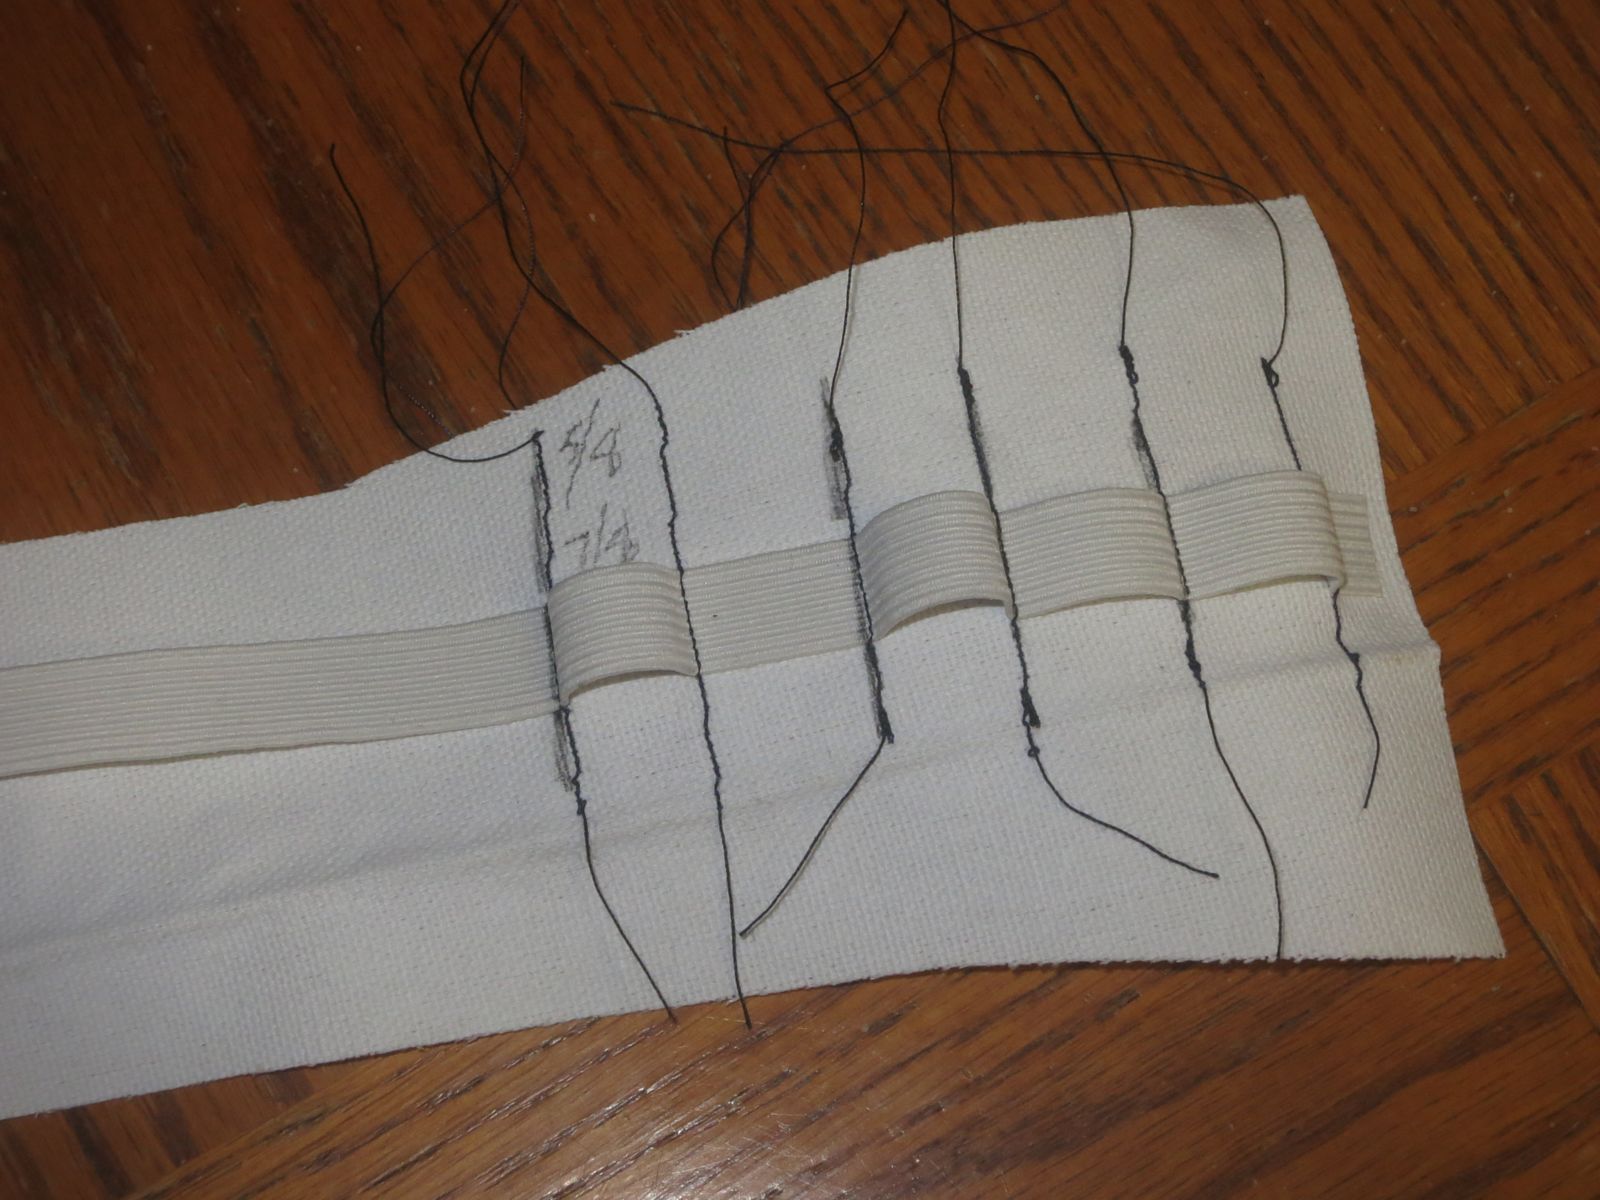
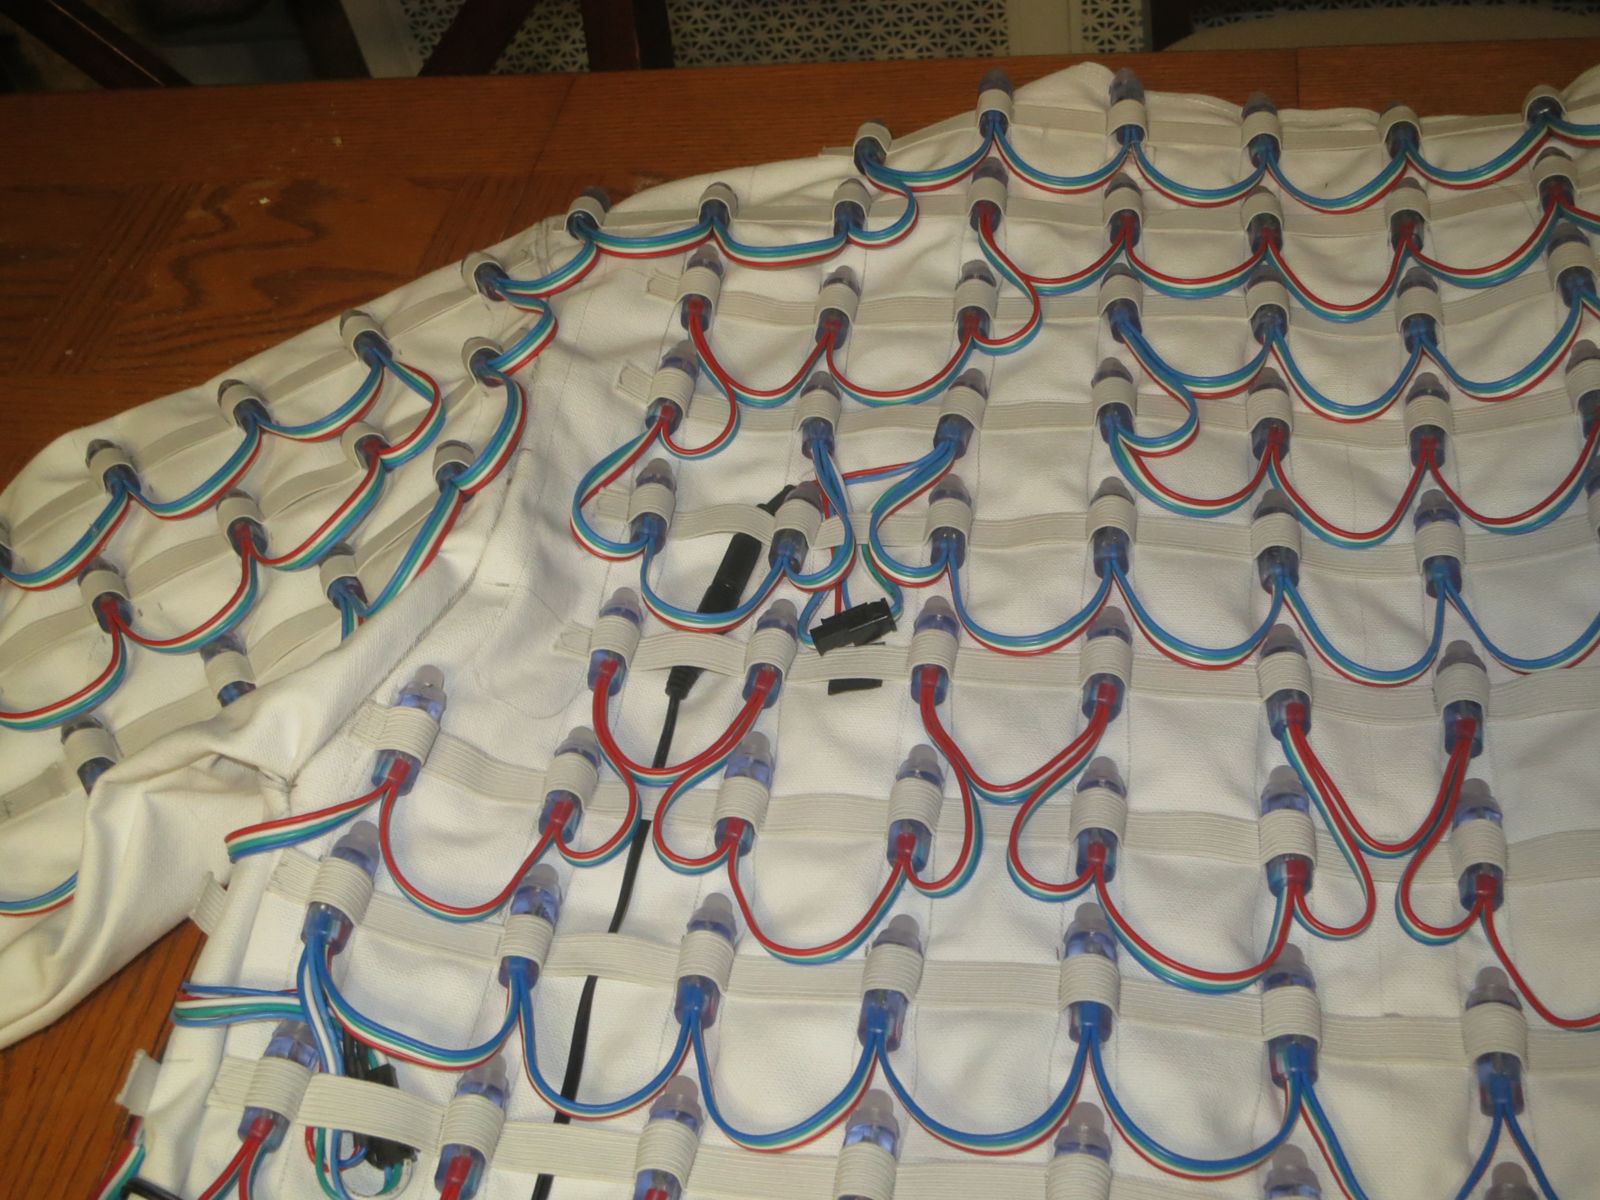
Before putting these together though I added strips of elastic to create loops to hold the LEDs.
I guessed an appropriate spacing for the LEDs was about two inches in a square grid and based on that figured that 400 would give me decent coverage. When I received them I found that two inches was just about perfect for the physical size of the LED modules along with the wiring although I think the illumination would look marginally better with slightly closer spacing.
Similarly I worked out that 7/8 inch of elastic spaced over 5/8 inch of fabric seemed to be about the right spacing to hold the LED module in place firmly
The process was something like:
Marking the panels:

Marking the elastic:
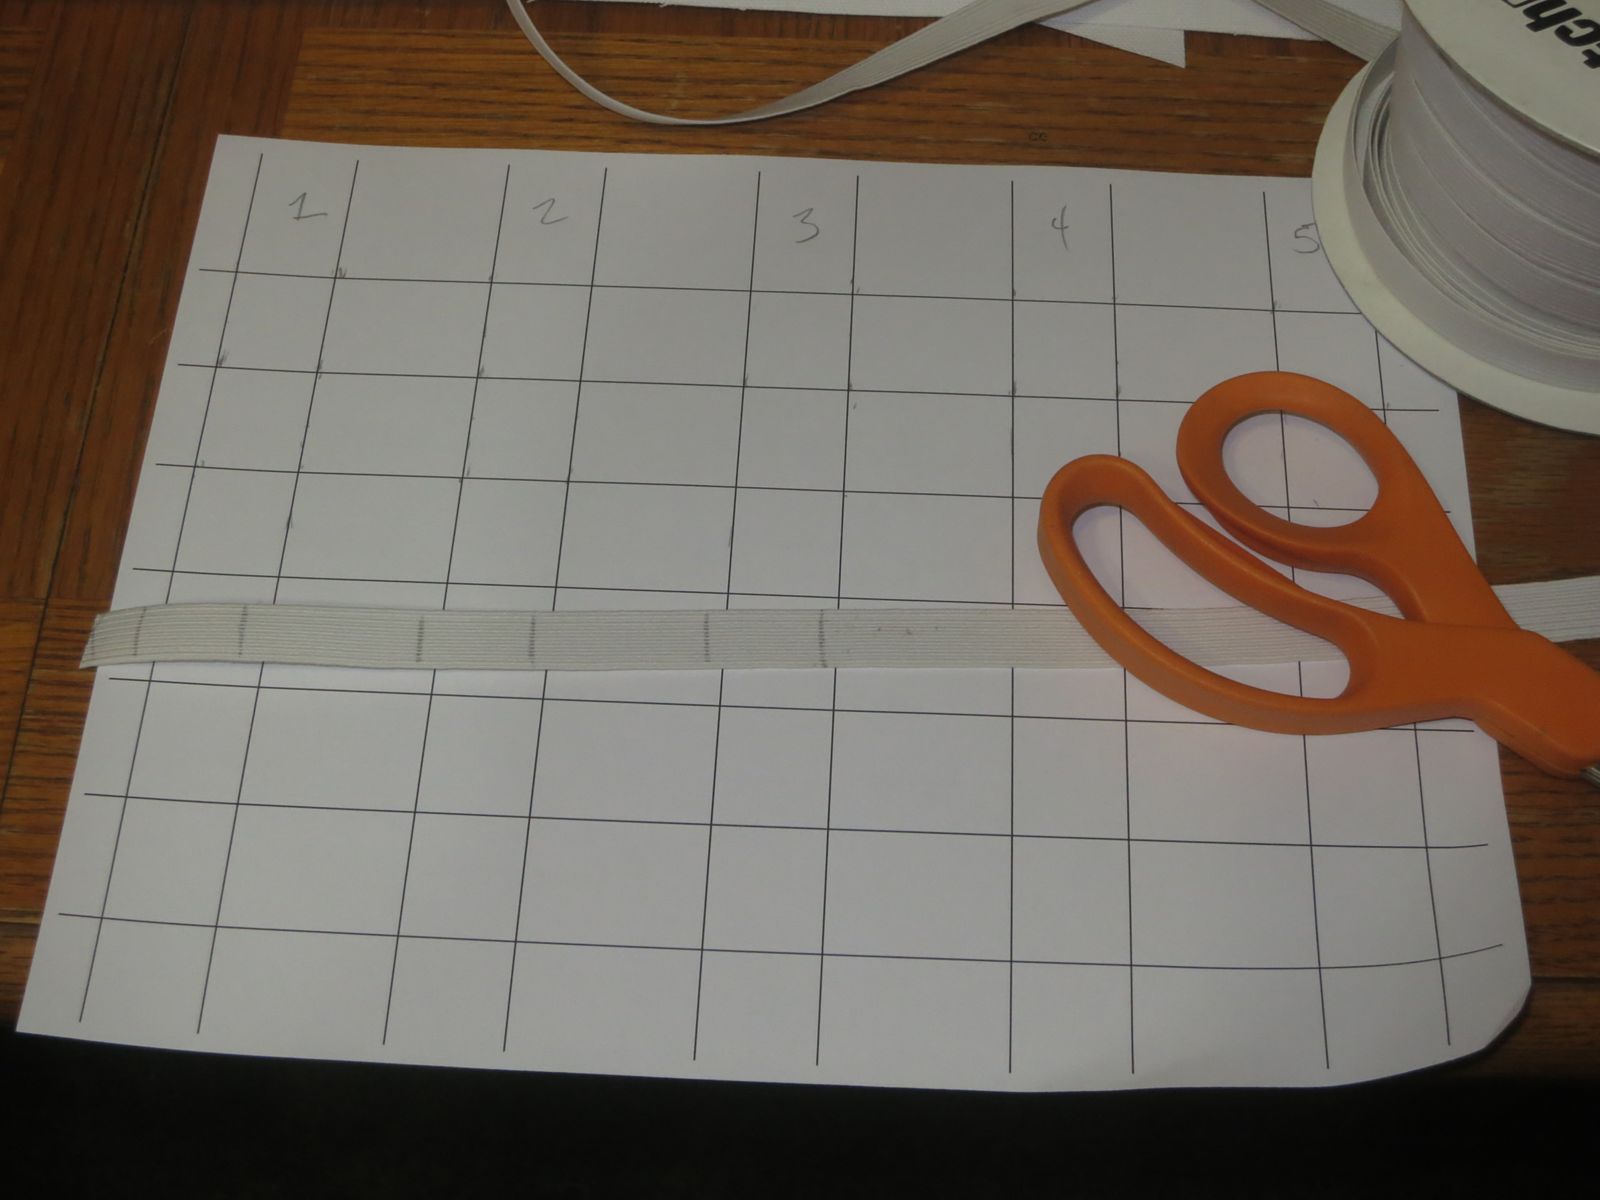
Somewhere in this process I figured out how many LEDs fit on the torso section and thus how many were left to go on the arms. And made an appropriate grid for that as well.
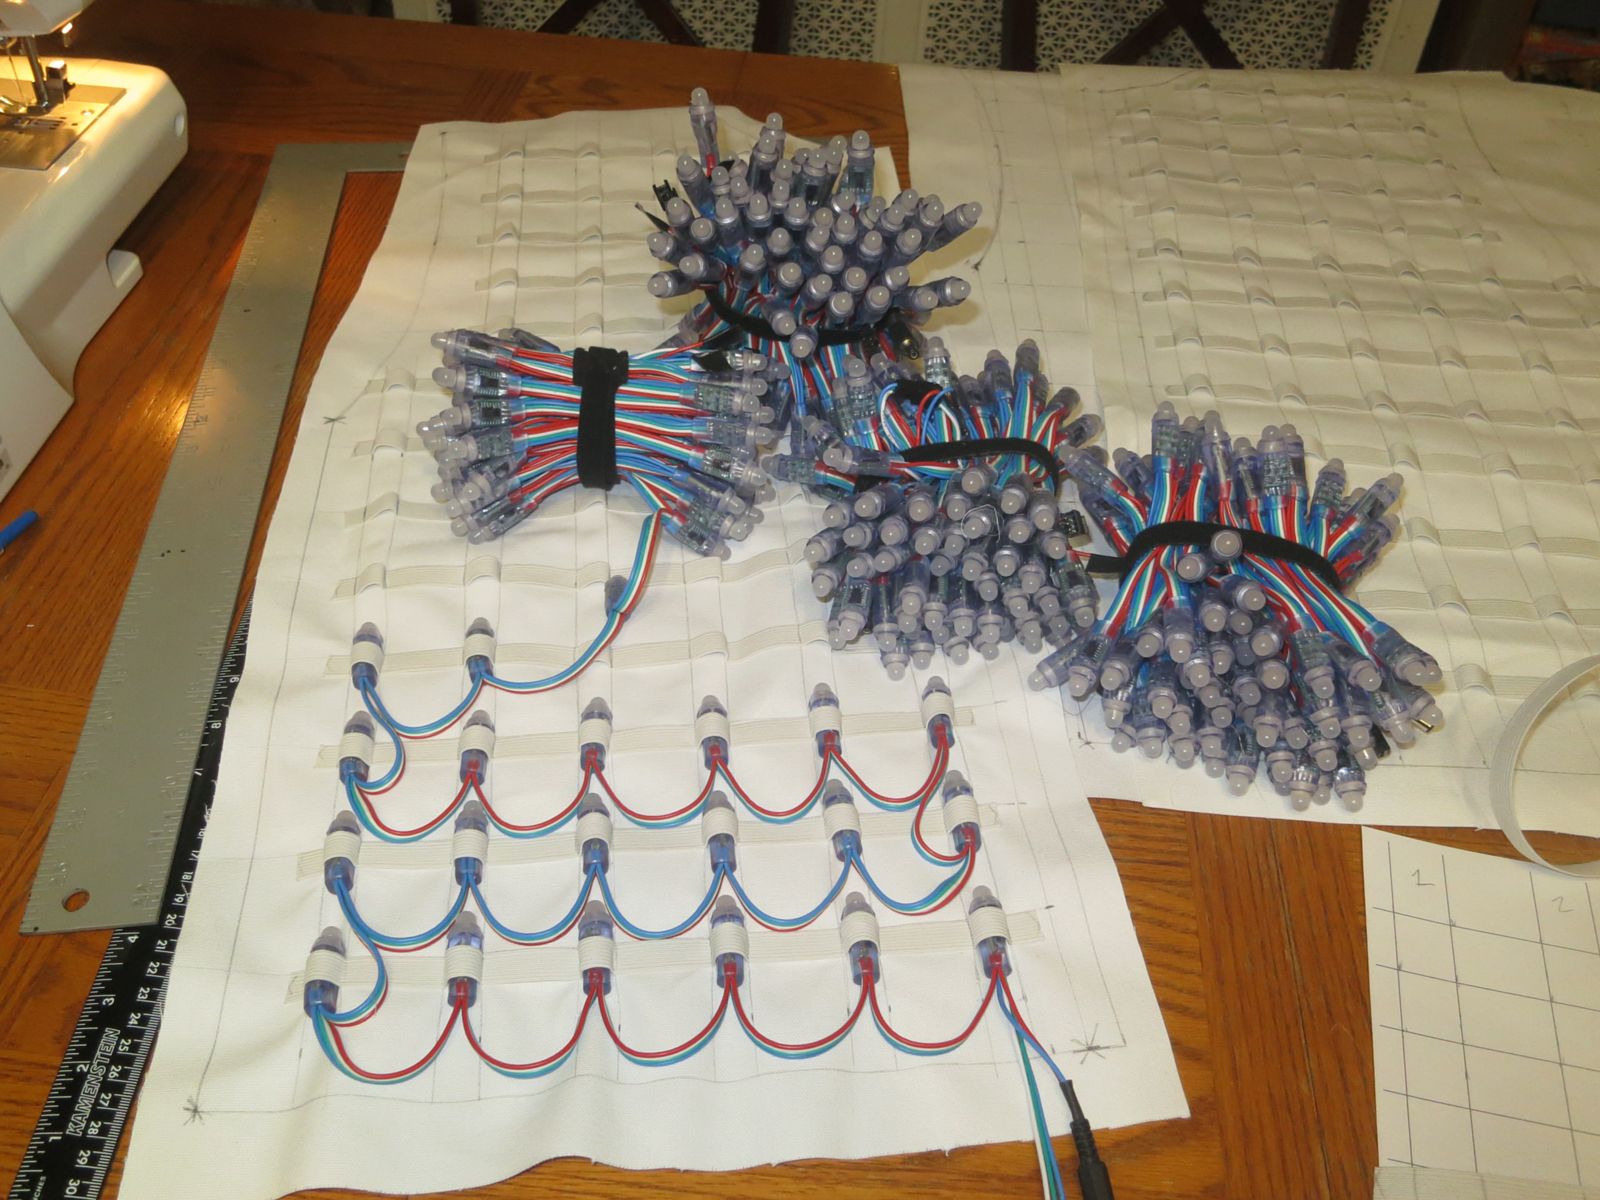
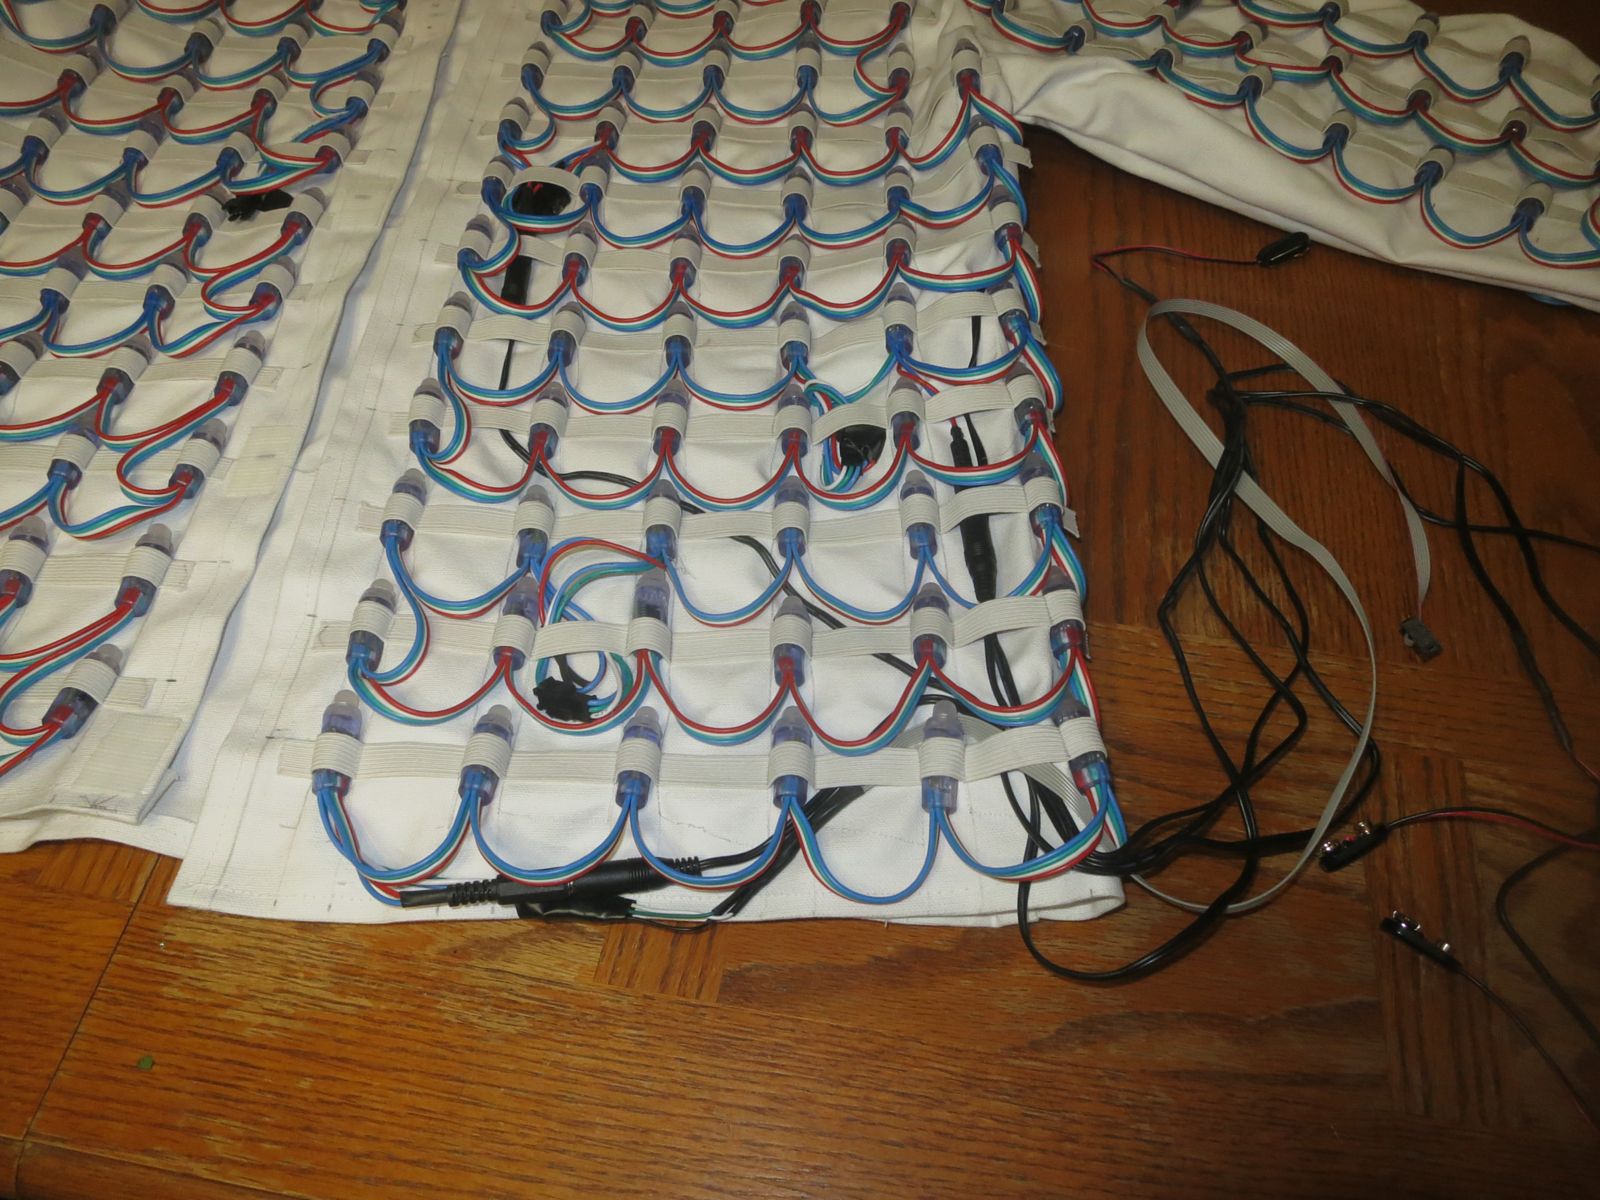
The LED strings I bought are strings of 50 sealed modules with each module having a WS2801 controlled RGB LED that run off of 5 volts. Ultimately I chained the data lines so that all 400 were on the same data path and for power, paired up each string with one more so there are only 100 LEDs per group for power (maxing out at about 3 amp per group of 100).
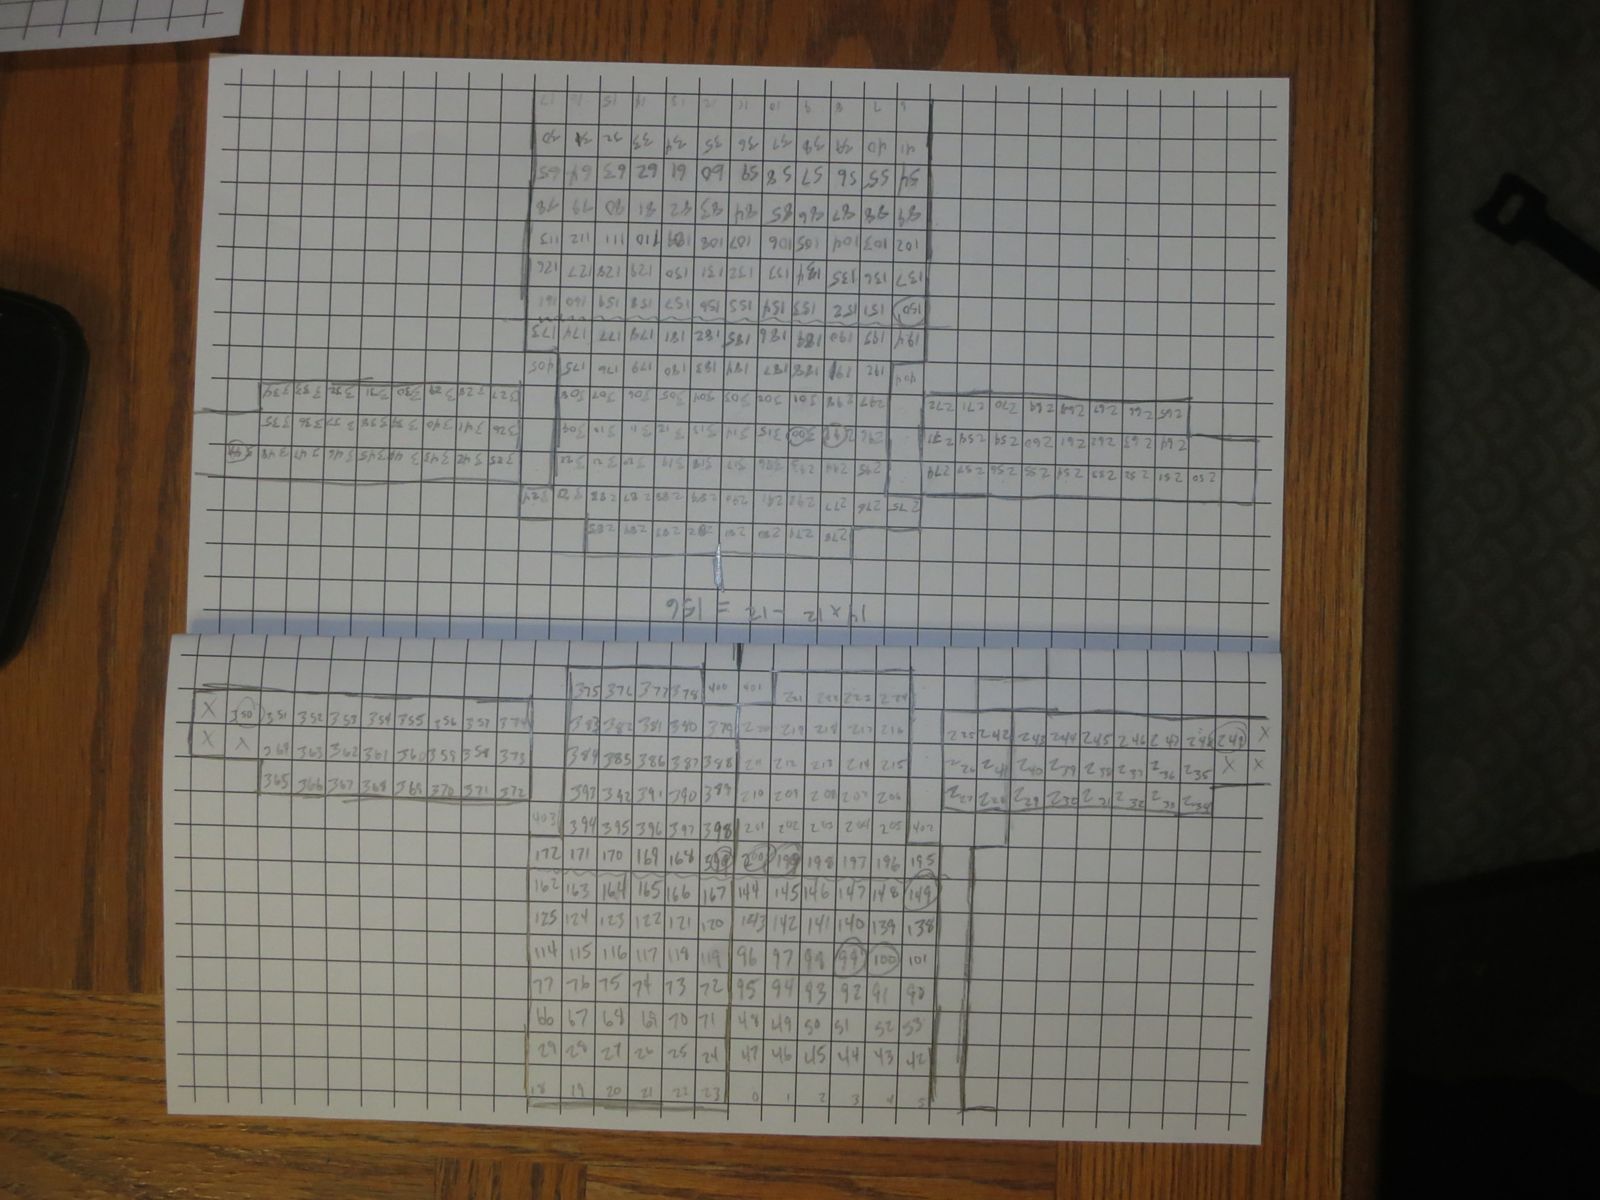
At this point I needed to map out where the LEDs went. In an ideal world everything would be in a nice simple grid that is easily computable so display routines are quick and efficient. However there are several constraints that preclude this.
The map on graph paper:
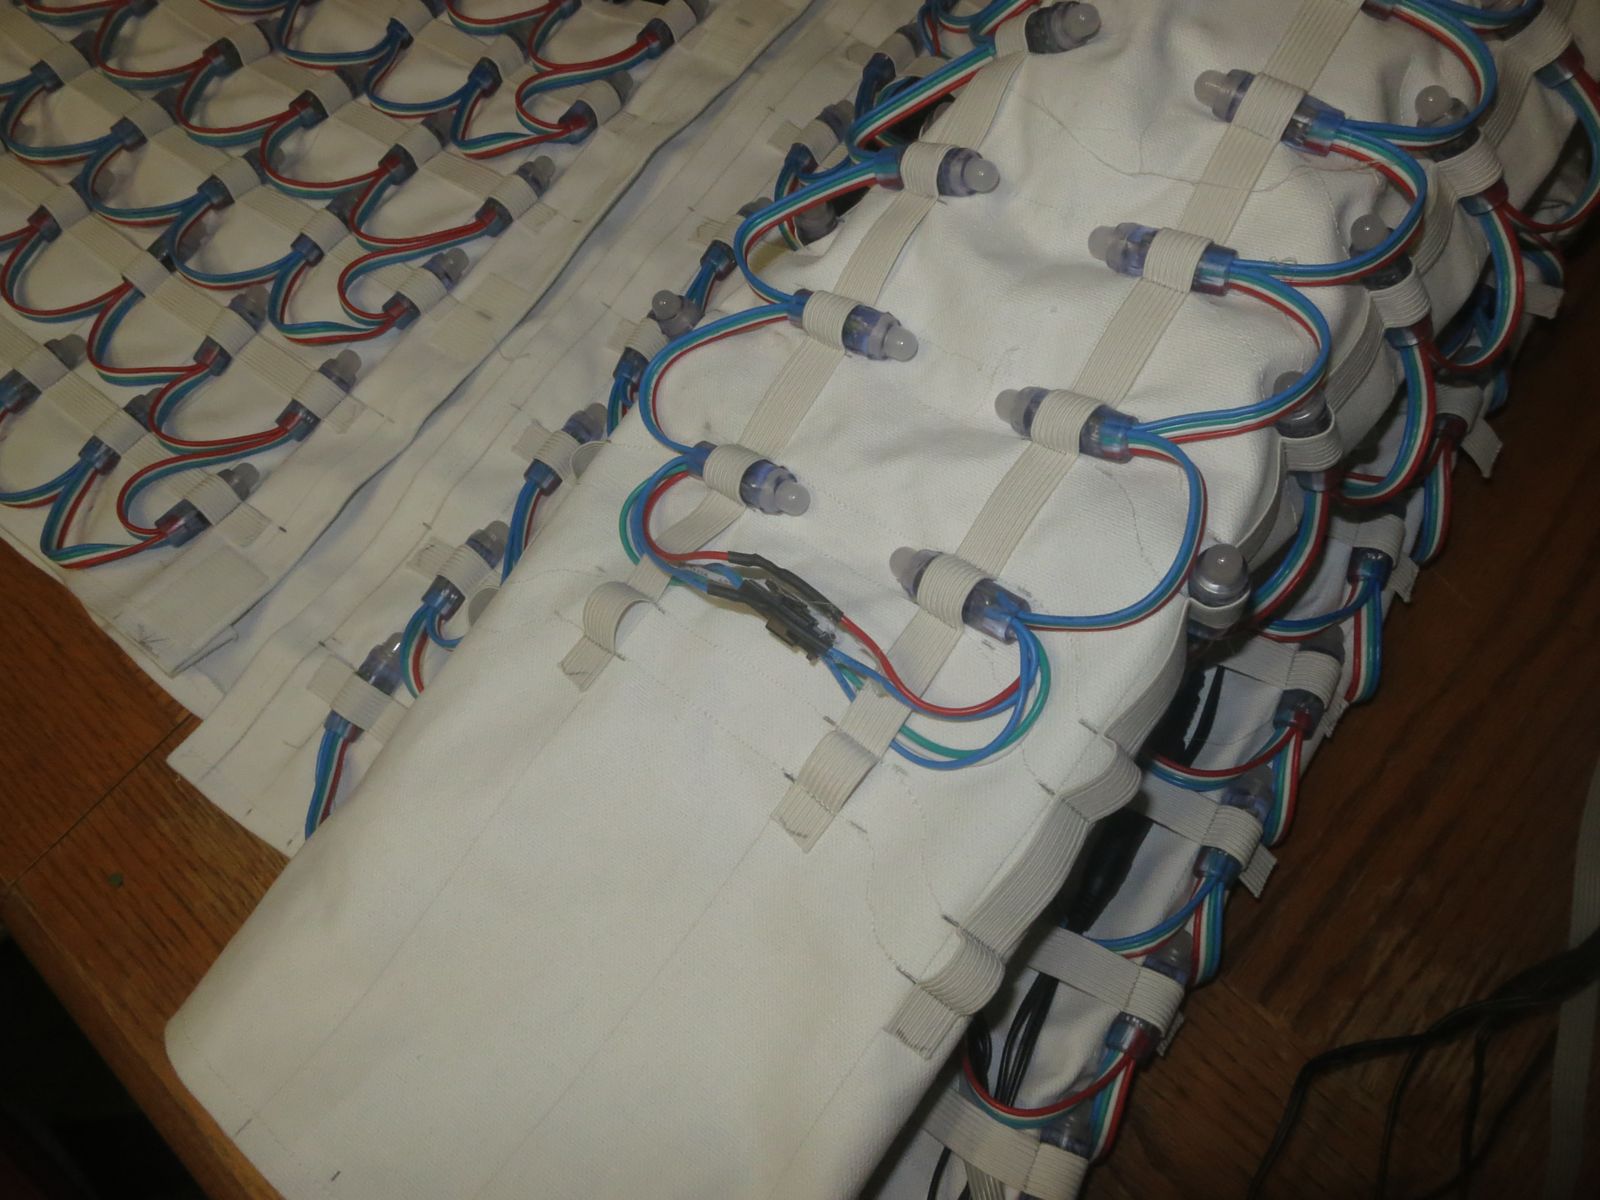
At this point I ran the LEDs to their appropriate spaces and made sure to keep the cabling clean.
In some places the pathing is a little bit crazy
Coming off the liner are four 5V power lines and a data cable. The extra elastic loops between the LEDs make great conduits to run these cables neatly. Currently each power line goes to a pack of four AA NiMH cells and the data cable goes to the SPI port on the arduino microcontroller (with the arduino powered by a USB charger to provide a regulated 5V).
(update: I've since made 4 packs of 6 18650 Li-ion cells and installed protection boards (providing under and over voltage protection along with short circuit/over amperage protection) and coupled each pack with a 5 volt, 3 amp boost power supply. I'm monitoring the battery levels with four of the analog inputs on the microcontroller. I've added 6 pockets inside the front of the jacket to hold all of the batteries and the micro controller. I also added sew on snaps since the original velcro closure wasn't quite adequate.)
First I needed that map of the LED positions transferred to something useful. I entered the map into a couple of text files that could be read by a python script to generate C code such that for each pixel I know which pixel is above, below, to the right and left and have flags for if that pixel is at the top or bottom (and I have plans to add flags for front, sleeve and maybe a couple of other things).
I don't have much in the way of interesting displays right now. I've only just got the whole thing functional. The most interesting is a set of 5 seeds that wander randomly around the coat from which diamond shape is built until it runs into another diamond (I'm explaining that very poorly). But this is something I wish to spend more time playing with.
Things that I should add:
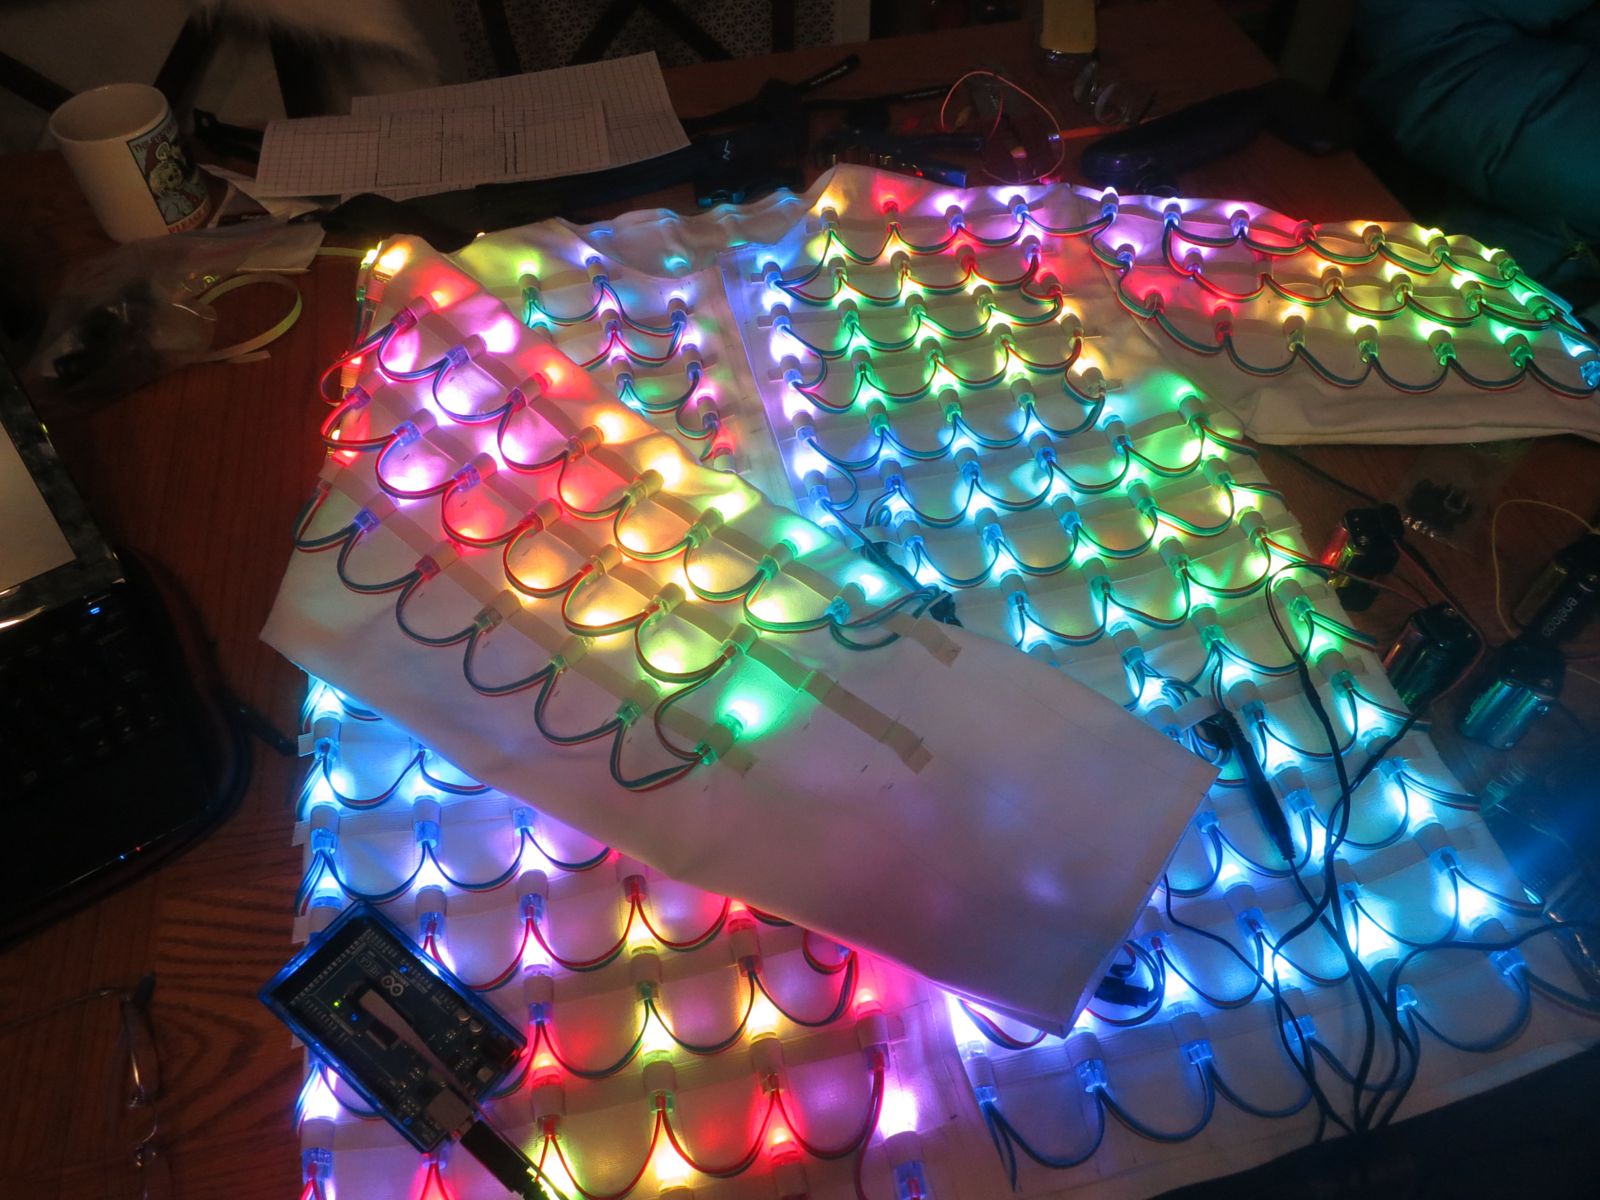
A picture of the liner lit up:
With the exception of the first image, all images and text are copyright Xuth (jim@xuth.net). The first image was taken by and is copyright bk7j.